How to upgrade to Linux Mint 20
This page explains how to upgrade from Linux Mint 19.3 to Linux Mint 20.
Requirements
64-bit architecture
Although both 32-bit and 64-bit versions of Linux Mint 19.3 are supported until April 2023, new releases of Linux Mint, including 20, are only available in 64-bit.
To upgrade to Linux Mint 20 you need to be running the 64-bit version of Linux Mint 19.3.
To check which version you’re running type:
dpkg --print-architecture
If it says amd64 you can upgrade to Linux Mint 20.
If it says i386, it means you’re using the 32-bit version. In this case you cannot upgrade and you need to stick with Linux Mint 19.3.
Experience with APT
To upgrade to Linux Mint 20 you need experience with APT and the command line.
Upgrading to a newer package base is not trivial and it should not be performed by novice users.
You need to know how to type commands and read their output.
You also need to be experienced with APT. During the upgrade you’ll need to understand the output of APT commands. You’ll need to understand if a package needs to be removed, if it blocks the upgrade or if it conflicts with another package.
Preparation
Apply all package updates
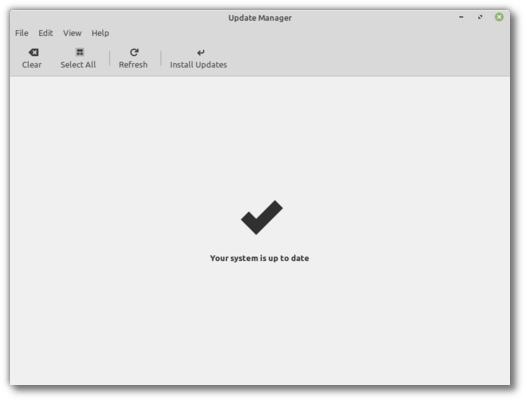
To apply all updates:
Launch the Update Manager with .
Press the Refresh button to update the cache.
Press the Select All button to select all updates.
Press the Install Updates button.
Follow the instructions from the Update Manager and install all updates until the manager tells you the system is up to date.
Reboot the computer.
Create a system snapshot
If anything breaks or if anything goes wrong during the upgrade, you can go back in time and revert all changes by restoring your latest system snapshot. Whatever happens, you’re covered. You’ll be able to restore your operating system to this current state, either from within Linux Mint, or by launching Timeshift from a live Mint session (live DVD or live USB).
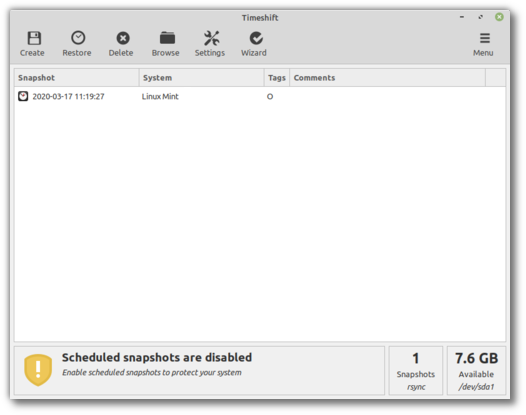
To create a system snapshot:
Launch Timeshift with .
Follow the wizard to select a destination for your snapshots.
In the toolbar, click on the Create button to make a manual snapshot of your operating system.
Purge PPAs and 3rd party repositories
PPAs or 3rd party repositories can introduce issues during the upgrade if the versions of the packages they provide are higher than in Linux Mint 20. This can result in unmet dependencies, held packages or resolver issues.
To purge 3rd party packages follow these steps:
Launch the Software Sources tool from .
Open the Additional repositories tab and disable all additional repositories.
Open the PPA tab and disable all PPAs.
Click on the button to refresh your APT cache.
Open the Maintenance tab and click on Downgrade Foreign Packages.
Select all foreign packages and click Downgrade.
Click on Remove Foreign Packages.
Select all foreign packages and click Remove.
Reboot the computer.
Create another Timeshift snapshot.
Note
This step is optional but it is strongly recommended. Some PPAs are perfectly fine, some aren’t. Some only add packages and don’t impact the upgrade process, others introduce dependencies which cannot be resolved.
You can leave some foreign packages installed or in their 3rd party version and try to upgrade if you want. If it works, then great. If it doesn’t, you can always restore the previous snapshot and follow the steps above to purge them before trying again.
Upgrade
Install the upgrade tool
To install the upgrade tool, open a terminal and type:
apt install mintupgrade
Check the upgrade
To simulate an upgrade, open a terminal and type:
mintupgrade check
Then follow the instructions on the screen.
This command temporarily points your system to the Linux Mint 20 repositories and calculates the impact of an upgrade.
Note that this command doesn’t affect your system. After the simulation is finished, your original repositories are restored.
The output shows you if the upgrade is possible, and if it is, which packages would be upgraded, installed, removed and kept back.
Note
It is extremely important that you pay close attention to the output of this command.
Keep using mintupgrade check and do not proceed to the next step, until you’re happy with the output.
Hint
If this steps fails half-way through type mintupgrade restore-sources to go back to your original APT configuration.
Download the package updates
To download the packages necessary to upgrade, type the following command:
mintupgrade download
Note that this command doesn’t actually perform the upgrade itself, but just downloads the packages.
Apply the upgrades
Warning
This step is non-reversible. Once you perform it, the only way to go back is by restoring a system snapshot.
To apply the upgrades, type the following command:
mintupgrade upgrade
Downgrade foreign packages
Some of your packages might have a lower version in Linux Mint 20 than in Linux Mint 19.3. To guarantee they function properly, they need to be downgraded.
Launch the Software Sources tool from .
Open the Maintenance tab and click on Downgrade Foreign Packages.
Select all foreign packages and click Downgrade.
Delete foreign packages
Some packages no longer exist in Linux Mint 20 and can safely be removed.
Launch the Software Sources tool from .
Open the Maintenance tab and click on Remove Foreign Packages.
With the exception of packages you want to keep, select all foreign packages and click Remove.
Troubleshooting
Installing mintupgrade
If you can’t find mintupgrade in the repositories, switch to the default Linux Mint mirror and refresh the APT cache.
Restoring a snapshot
A known issue affects Timeshift. When restoring a snapshot, if the Disclaimer window is empty, wait for about 2 minutes for the text to appear. Once the disclaimer text is there you can press Next and restore your snapshot. Pressing Next before the text appears results in a failure to restore. If you did, reboot and try to restore again.
Skipping the timeshift requirement
If you’re using another snapshot tool and would rather not use Timeshift, you can skip the Timeshift requirement with the following command:
echo "{}" | sudo tee /etc/timeshift.json
Don’t forget to remove that file after the upgrade if you want Timeshift to work properly.
Computer freeze
On some computers the upgrade can be quite intensive and it can temporarily freeze the desktop. This can last for up to 10 minutes at times or even take hours on slow computers. This is OK, be patient and give it time.
If this becomes a problem, logout completely, drop to console with CTRL+ALT+F2 and run mintupgrade upgrade from there instead.
Broken boot
If the computer no longer boots, boot from the live Linux Mint 19.3 ISO.
From the live session, launch Boot Repair and use it to fix the boot sequence.
If this doesn’t work, boot from the live Linux Mint ISO again, and launch Timeshift.
Timeshift is able to scan your drives from the live session and restore your snapshot from there.
Boot warnings
You can ignore boot warnings related to ACPI or initramfs unpacking. They’re cosmetic and do not affect the boot sequence.
Notes
The upgrade overwrites files in /etc/ with default configuration files. You can restore files indivually by the Timeshift snapshot you made prior to upgrading.
To restore your lightDM settings, run the Login Window configuration tool (sudo lightdm-settings).
Alternatives
If you cannot upgrade perform a fresh installation.
Generic instructions on fresh upgrades are also available.